Life can throw unexpected challenges, but tackling them doesn’t have to be daunting. Easy DIY fixes offer simple solutions for everyday problems, empowering anyone to take charge of their space without breaking the bank. From squeaky doors to leaky faucets, these quick fixes can transform a frustrating situation into a satisfying accomplishment.
With just a few tools and a bit of creativity, anyone can become their own handyman or handywoman. This article uncovers a variety of straightforward DIY projects that anyone can master, making home maintenance not only manageable but also enjoyable. Whether you’re a seasoned DIY enthusiast or just starting out, these easy fixes will inspire confidence and spark a desire to improve your living environment.
Table of Contents
ToggleOverview of Easy DIY Fixes
Easy DIY fixes offer practical solutions for common home maintenance problems. Homeowners often face issues like squeaky doors, leaky faucets, or chipped paint. Each of these challenges can be resolved with simple techniques requiring minimal tools and resources.
Squeaky doors can benefit from a straightforward application of lubricant. Using WD-40 or silicone spray effectively eliminates annoying sounds. Homeowners can spray the hinges and gently open and close the door to distribute the lubricant.
Leaky faucets frequently arise due to worn washers or seals. Replacing these components with easily obtainable parts can restore functionality. Homeowners can turn off the water supply, disassemble the faucet, and replace the affected pieces.
Chipped paint on walls or trim presents an opportunity for a quick refresh. A small amount of matching paint and a brush will suffice. Touching up the affected areas improves aesthetics without the need for a complete repaint.
Easy DIY fixes empower individuals to maintain their homes effectively. With a bit of preparation and creativity, tackling repairs becomes not only manageable but also rewarding.
Common Household Problems
Homeowners often encounter various common issues that can be easily resolved with simple DIY fixes. Understanding how to tackle these challenges minimizes repair costs and ensures a comfortable living environment.
Leaky Faucets
Leaky faucets are a frequent annoyance, often caused by worn washers or seals. To fix a leaky faucet, homeowners can first turn off the water supply. Next, they should disassemble the faucet using a wrench. After removing the handle, they can replace the washer or seal with a new one, ensuring a snug fit. Tighten the faucet back together and turn the water supply on to check for leaks. A properly sealed faucet prevents water wastage and reduces utility bills.
Creaky Floors
Creaky floors often result from loose floorboards or gaps between boards. To remedy this, homeowners can apply wood screws to secure loose boards tightly to the floor joists beneath. For gaps, they can use a wood filler or caulk designed for flooring. After filling the gaps, sanding the area smooth ensures a more cohesive look. This fix not only silences the creaks but also enhances the overall appearance of the floor.
Stuck Windows
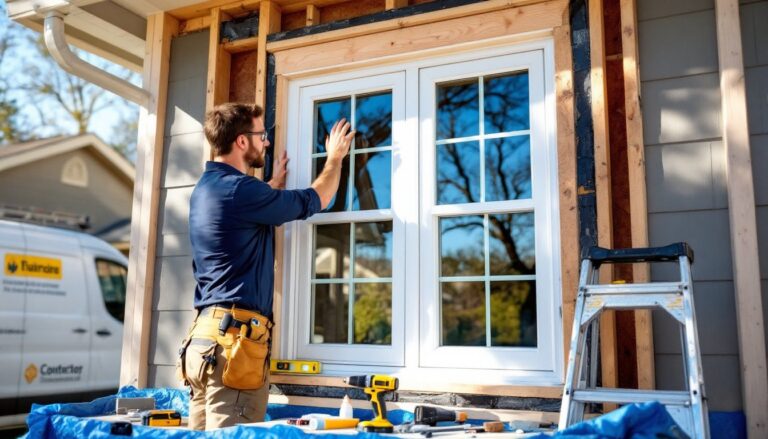
Stuck windows can frustrate homeowners, especially during seasonal changes. To fix stuck windows, they can begin by inspecting the tracks for dirt or debris. Cleaning the window tracks with a vacuum or cloth removes any obstructions. If the window remains stuck, applying a silicone-based lubricant to the tracks can help loosen it. For windows with paint buildup, carefully scraping with a utility knife helps free them. An operational window improves ventilation and accessibility, enhancing home comfort.
Tools Required for Easy DIY Fixes
Having the right tools enhances the ease of tackling home maintenance tasks. Essential hand tools and safety gear are crucial for completing various DIY projects effectively.
Essential Hand Tools
- Hammer: Used for driving nails into walls or securing wooden parts.
- Screwdriver: Essential for tightening or loosening screws; both flathead and Phillips types are necessary.
- Pliers: Useful for gripping, bending, or cutting wire and other materials.
- Utility Knife: Ideal for cutting through various materials, from cardboard to carpet.
- Tape Measure: Necessary for measuring spaces and ensuring accurate cuts.
- Level: Ensures that shelves and frames are straight, preventing future issues.
- Wrench Set: Required for tightening or loosening nuts and bolts of different sizes.
Safety Gear
- Safety Glasses: Protect eyes from debris during cutting or drilling.
- Work Gloves: Safeguard hands from injuries while handling tools or materials.
- Dust Mask: Essential for preventing inhalation of dust or particles during renovation.
- Ear Protection: Reduces noise exposure when using loud power tools.
- Knee Pads: Provide comfort and protection when working on floors or low-lying areas.
Equipping with these hand tools and safety gear enables smoother completion of DIY fixes and promotes a safer working environment.
Step-by-Step Guide to Popular DIY Fixes
Many homeowners can address common issues with straightforward solutions. Below are detailed guides on fixing a leaky faucet, patching drywall holes, and installing a new light fixture.
Fixing a Leaky Faucet
Fixing a leaky faucet saves water and reduces utility bills.
- Turn off the water supply: Locate the shutoff valves under the sink and turn them clockwise.
- Remove the faucet handle: Depending on the type, you may need to unscrew or pry off a decorative cap.
- Disassemble the faucet: Use a wrench to loosen and remove the main body of the faucet.
- Replace worn washers or seals: Inspect washers and O-rings, replacing any that show signs of wear or damage.
- Reassemble the faucet: Reverse the disassembly steps and ensure all parts fit snugly.
- Turn on the water supply: Open the shutoff valves to check for leaks.
Patching Drywall Holes
Patching drywall holes restores appearance and prevents further damage.
- Clean the area: Remove any loose debris around the hole.
- Choose the patching method: For small holes (less than 1/2 inch), use spackle. For larger holes, use a drywall patch.
- Apply patching compound: Spread the compound over the hole with a putty knife, feathering the edges for a smooth finish.
- Let it dry: Follow the manufacturer’s instructions for drying times.
- Sand the patched area: Once dry, sand the surface until smooth and level with the surrounding wall.
- Prime and paint: Apply primer and a matching paint color for a seamless look.
Installing a New Light Fixture
Installing a new light fixture enhances ambiance and functionality.
- Turn off power at the circuit breaker: Ensure the electricity is off for safety.
- Remove the old fixture: Unscrew the old fixture from the ceiling and disconnect the wires.
- Prepare the new fixture: Follow the manufacturer’s instructions to connect the wires; typically, black (hot) to black, white (neutral) to white, and green or bare (ground) to the fixture’s ground wire.
- Attach the new fixture: Secure the fixture to the ceiling using screws or brackets provided.
- Restore power and test: Turn on the power at the circuit breaker and test the new light fixture.
These simple yet effective DIY fixes empower homeowners to maintain their living spaces efficiently.
Tips for Successful DIY Projects
- Plan Ahead: Create a list of tasks and gather necessary materials before starting. This saves time and reduces frustration during the project.
- Research Thoroughly: Consult online resources, videos, or instructional guides related to specific tasks. Understanding the steps involved helps prevent mistakes.
- Start Small: Choose simple projects to build confidence. Successful completion of smaller tasks encourages tackling more complex projects over time.
- Keep Tools Organized: Store tools in a designated space to avoid misplacement. An organized workspace allows for quicker access and smoother workflow.
- Measure Twice, Cut Once: Take accurate measurements to minimize waste and ensure proper fit. This principle applies to materials like wood, drywall, and trim.
- Use the Right Materials: Select high-quality supplies appropriate for the project. Using suitable materials contributes to durability and overall success.
- Take Breaks: Allow time for rest during lengthy tasks to maintain focus and energy levels. This decreases the likelihood of errors.
- Involve Others: Enlist friends or family for projects requiring extra hands. Collaboration makes tasks more enjoyable.
- Practice Safety First: Always wear safety gear such as gloves and goggles. Understanding safety procedures protects against injuries.
- Celebrate Progress: Acknowledge completed projects, no matter how small. Celebrating achievements boosts motivation for future DIY endeavors.
Embracing easy DIY fixes can transform home maintenance from a daunting task into an enjoyable experience. With just a few essential tools and a bit of creativity anyone can tackle common household issues effectively. These straightforward projects not only save money but also empower individuals to take ownership of their living spaces.
By following the practical techniques outlined in the article homeowners can confidently address everything from squeaky doors to leaky faucets. The satisfaction that comes from completing these projects fosters a sense of accomplishment and encourages further exploration into DIY endeavors. With the right mindset and preparation anyone can turn their home into a well-maintained sanctuary.